Search This Blog

Wednesday, March 16, 2011

I'll Eat My Hat!

Spring has sprung my friends. Ok, maybe it has not fully sprung, but it is indeed springing. I happily lost an hour of sleep this past weekend to gain an hour of daylight, my crocuses are blooming and we are getting ready for Purim.

Ah, Purim. One of the most fun Jewish Holidays to celebrate during the year. It is taken from the Book of Esther. I won’t take up the space with the story of Purim. You can read that here. But basically every Jewish Holiday is based on the same principal. The Jews are persecuted, the Jews find a way, and they celebrate their freedom.

Jewish people get together on 13th day of the Jewish month, Adar to read the story of Purim in the Megillah. Children dress in costume, adults are encouraged to get intoxicated and shake noisemakers and boo loudly when the name “Hamen” is read.

The villain of the Purim story is a character named Hamen. He was a prime minister of sorts to the Persian King who punished Jews for not bowing down to him. Basically the villain of Purim. Haman wore an triangular shaped hat , and that is the story of how the hamentashen cookie came to be.

Before attempting to make my hamentashen this year, I researched for the perfect recipe. Last year I decided to take a short cut and use ready made refridgarated pie crust for the dough. Big mistake. The dough was way too flaky and not sweet enough. Since the cookies are typically filled with a sweet fruit filling, you really have to be careful to balance the sweetness of the dough with the filling. You do not want it too sweet, but yet it shouldn’t taste like a dinner biscuit either. My sister had a disappointing hamentashen experience this year as well. She used a cake mix, added a few extra ingredients, but was not happy with her results. While the taste was decent, the dough did not hold together.

My friend pointed me to a blog that her cousin writes for her Jewish Community. I scanned the recipe and had all the ingredients on hand for the dough, which was one of my requirements for selection. The ingredients seem to provide what I was looking for in a dough. Butter which would lend the fat, a full cup of sugar which would give it proper sweetness, but not too much and a cup of heavy cream which I felt would give finished product a soft bite, unlike a sugar cookie.

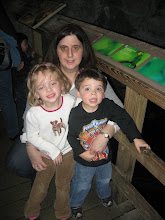
I set to work with 3 little helpers ages 5-7. After rolling out the dough we all took turns cutting out perfect circles with an upside down drinking cup. As we were cutting, my 7-year old could not figure out how the cookies were going to be triangles. My 5-year old son an his friend filled each circle with a generous teaspoon of apricot and red raspberry jam. Traditionally poppy seed and prune filling is used, but since I figured the kids would be eating most of them, I stuck with the flavors I knew would be winners to younger, less advanced palates.
Folding up the edges of the circle to seal the fruit filling produced the triangle shape. Once my daughter saw how it was done, it was a easy job for her to do.
After a bake in the oven to turn light golden brown, it was decided that this will be my Hamentashen recipe. Easy ingredients, it came together easy, and tasted absolutely delicious!

Perfect Hamentashen


Adapted from the J.Mom.com


I found that chilling the dough for a few hours before rolling it out made a better cookie. The ingredients came together easily in the mixer and I patted it down into a disc and threw it in the fridge. I took it out about 45 minutes before rolling it out.

Dough:
• ½ lb butter
• 1 cup sugar
• 2 eggs
• 1 teaspoon vanilla
• 4 1/2-5 1/2 cups flour
• 2 heaping teaspoons of baking powder
• 8 ounces of heavy cream

Filling:
2 jars of preserves. I think apricot and raspberry work the best.

Preheat oven to 350.

Cream butter and sugar. Add eggs one at a time. Add vanilla and baking powder. Slowly add the flour with the cream until the dough is no longer sticky. You will need some of the flour to put on the counter in order roll out the dough and put on the rolling pin.

Roll dough out and use a glass or round cookie cutter. Place a spoonful of filling in the middle of the circle. Pinch dough to form a triangle. Place on a cookie sheet lined with parchment paper. Bake 10-15 minutes. Makes 4 dozen.

Tuesday, February 22, 2011

The Advantage of Being Indecisive

The phone woke me up way too early this morning with the news I was dreading to hear. Schools will be closed today for inclement weather. Why is the woman delivering this recorded message so chipper? She must not have kids. My kids have been home now since last Friday (early dismissal day) through today and my patience level is wearing thin. We have had so many snow days this school year so far. Some legitimate, some that left me scratching my head. I do know when I hear the words “Snow Day”, my thoughts turn to baking. I know I am not unique to this association. Everyone seems to get their bake on when the white stuff falls.
I was not quite sure what I was in the mood to create this morning. I wanted some type of cookie, so that the kids can help with the measuring and pouring. I was drawn to the Monster Cookies by the guys at Baked.

Let me back track and talk about my love of Baked.

My first experience with Baked, was with their brownie mix. Normally I do not go for mixes. I figure with what you have to add to a mix, you get a sub-par product which you could have easily created yourself. However, the reviews for this brownie mix were obscene. Consistent 5 star reviews piqued my interest. I bought the mix ($16 dollars, no less!) and prepared them. The five star reviews were dead on. I have never had a brownie so good, from a mix, homemade or purchased from a bakery. It was positively perfect. After the brownies, I became obsessed. I bought the two cookbooks by the guys at Baked Bakery the area of Red Hook, Brooklyn and read them cover to cover, covering it with post it notes of what I wanted to conquer, including those brownies.

Today was Monster Cookies. These cookies are an insane combination of whatever cookie you are craving. Chocolate chip, peanut butter and oatmeal cookies are covered by this recipe. So, if you can’t make up your mind, the monster cookie will fit the bill nicely.

Scanning the ingredients, you immediately see this is a hefty cookie. Three cups of sugar, both granulated and brown. Two cups of peanut butter. More than 5 cups of oatmeal. Plus a generous 2 cups of M&Ms and chocolate chips. I needed 2 hands plus a helper to lift the mixing bowl. A scant amount of flour (just a ½ cup) is needed. A very small amount of corn syrup (1/4 of a teaspoon) is essential to the recipe according the Baked guys. I can’t seem to figure that one out, but I am in full compliance.

After all the ingredients are incorporated, you are instructed to cover the bowl tightly and refrigerate for 5 hours. The mix was fairly soft, so I am guessing the extra chilling time was to give the dough a chance to tighten up to be able to form scoops. I took the 5 hours of wait time as the inability to snack on the insanely delicious dough.


I put 6 scoops on a tray, but soon learned that this was a mistake. The cookie dough portions were made with an ice cream scoop that was approximately 3 tablespoons.


The 6 scoops were too many and as they cooked, they spread into each other in the hot oven. I reduced it to four cookies for the next tray and had better results. The cookie spread a little more than I thought it would. The picture in the book showed a hefty, thicker cookie. Mine was a flatter, lacy cookie. Delicious, none the less. Even though it was thin, it still had a nice chew, mostly due to the oatmeal.


The batter was so good. Cleanup and waste was not an issue.


Monster Cookies

Recipe courtesy of Baked: New Frontiers in Baking by Matt Lewis and Renato Poliafito

Makes 3 dozen cookies bigger than your head

1/2 cup all-purpose flour
1 tablespoon baking soda
Pinch of salt
5 ½ cups of rolled oats
3/4 cup cold butter, cut into cubes
1 1/2 cups granulated sugar
1 1/2 cups firmly packed light brown sugar
5 large eggs
1/4 teaspoon light corn syrup
1/4 teaspoon vanilla extract
2 cups creamy peanut butter (NOT the natural kind)
1 cup semisweet chocolate chips
1 cup M&M's

In a large bowl, combine flour, soda, salt and oats. In the bowl of an electric mixer cream butter until smooth and pale. Add sugars and mix until just incorporated. Add eggs one at a time, beating well after each. Stir in vanilla, corn syrup and peanut butter and mix until smooth but do not over mix. Stir in oat mixture in three additions, then fold in chocolate chips and candies. Refrigerate at least 5 hours or overnight. When ready to bake, heat oven to 350 degrees. Scoop generously sized balls (about 3-4 tablespoons worth) onto a baking sheet lined with parchment paper. Bake for 12-15 minutes until just barely browned, then remove from oven and let cool for 10 minutes on the baking sheet before removing to cooling rack.

Thursday, February 17, 2011

Well worth the Wait (and the weight!)


I feel like I am always apologizing for not writing. Here I am again, looking at my last post..5 months ago, and so much has changed in those past five months. Verizon finally got the iPhone, Egypt’s president finally stepped down, there is going to be another Royal Wedding (why are we so damn fascinated by that, anyway?) and Bel Air FINALLY has a Cupcake Shop.

Flavor Cupcakery finally opened in December in the convenient area of Tollgate Road and Boulton Street (118 North Tollgate Road). After months of delivering cupcakes to local area coffee shops, Flavor Cupcakery took the plunge and opened up a storefront.

Of course I went on opening day to wish them good luck and bring some treats home for the family. The shop sits between a take out chinese restaurant and Fritzies Deli, right across from the Bel Air Athletic Center. So, after I have burned 500+ calories during a workout, I can pass by and pick up my portion controlled cupcake without the guilt. Right? Don’t judge me!

Flavor offers tons of flavors. They rotate 4 flavors daily in addition to a classic nine flavors. The classics offered daily include Vanilla, Vanilla Milk Chocolate, Double Chocolate, Chocolate Vanilla, Red Velvet, Snickerdoodle, Chocolate Peanut Butter, Salted Caramel and Cookies 'n Cream. A gluten free option is also available daily. Milk, coffee and tea is also available to purchase.

When you walk into the shop, you are immediately charmed by the cuteness of it. A display of cupcake merchandise (aprons, T-shirts, notepads etc.) are available to browse and purchase while you wait to order your sweets. The cupcakes sit behind a beautiful bakery counter on silver cake stands, lined up like jewels, making the decision of what to get really hard. I have tried almost all the flavors to date (all research related, of course!) I have some stand out favorites including Maple Bacon, Key Lime, Creamsicle, Salted Caramel (My 7 year old’s favorite, what can I say, she has an advanced palate) and Red Velvet.


photo by Mark Rosica


Check out their website for all their additional flavors, cupcake accessories and pricing. They do gorgeous specialty cupcake displays for parties, showers, and corporate events. Also, give them a “like” on Facebook. You will get daily notifications of their flavors of the day and mouth watering photos from happy customers!

I wish Flavor Cupcakery tons of success! It’s about time that Harford County has gotten on board with what is hip and happening!

Flavor is open Tuesday through Saturday from 10-6, and Sunday from 10-2. They are closed Mondays.